Creating a Destination
You use the Destinations tab with the Inspector window to create and assign a destination
and to add file identifiers to your output file.
327
Chapter 27
Creating and Changing Destinations

You can create the following destinations.
• Local: Any directory on your own computer
• Open Volume: Any shared volume open on your desktop
Note: By default, the output media file destination is the same folder from which the
source media files originated. You can change the default destination to any other
Destination preset. Choose Compressor > Preferences and use the Default Destination
pop-menu to choose from the list of Destination presets.
To create a destination
1
Open the Destinations tab.
2
Click the Add (+) button.
The Destination Selection dialog appears.
3
Navigate to your chosen destination folder or open mounted volume, then click Open.
A new destination with the folder’s name appears in the Custom folder of the Destinations
tab along with the path to the folder you just assigned.
4
Double-click the new destination in the Destinations tab.
The Inspector window opens, showing relevant information for the new destination.
5
Do either of the following in the Inspector:
• Modify the name of the new destination in the Name field.
• Modify the pathname of the new destination by clicking Choose to open the destination
selection dialog and navigating to a new folder.
6
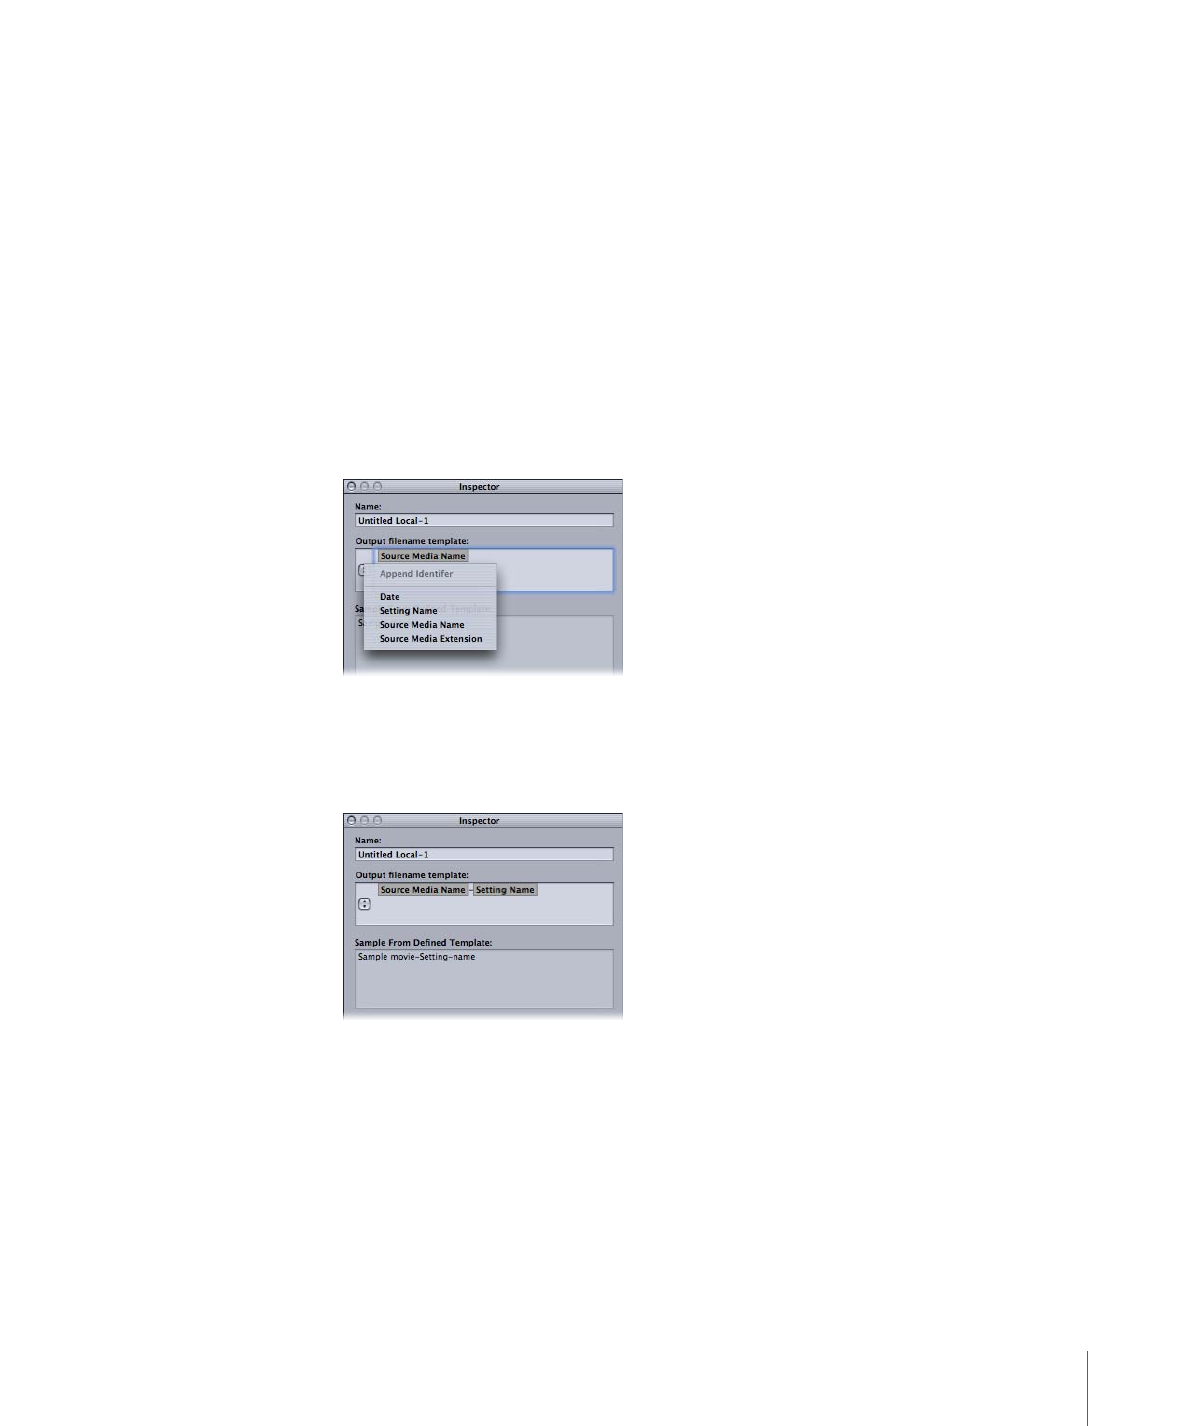
Add file identifiers to your output filename using the pop-up menu in the Output Filename
Template field.
Filename Template
pop-up menu
You can also manually edit this field by doing any of the following:
• Drag the file identifiers to rearrange their order.
• Click on either side of the file identifiers to type additional text.
• Use the Delete key on your keyboard to remove any of the file identifiers.
328
Chapter 27
Creating and Changing Destinations

The Sample From Defined Template field in the Inspector window shows a sample of the
output filename with its chosen file identifiers. The default file identifier combination is
Source Media Name-Setting Name.
Note: Avoid customizing your filename templates with anything beginning with a period
(.). The resulting file will only be visible via the command line and not visible using the
Mac OS X Finder.
See
About the Destinations Tab
for more details about these settings.
To change the default destination
1
Choose Compressor > Preferences.
2
Use the Default Destination pop-up menu to choose from the list of existing destination
presets.
The destination you choose appears as the default destination when you import a new
source file in the Batch window.