
Assigning Files to Surround Sound Channels (Automatic
Methods)
Compressor offers some streamlined channel assignment techniques that can save you
time.
To assign files to surround channels with channel identifier codes
1
Append the channel identifier code of the target surround channel to the filename of
each source audio file. (See the list below for a list of the appropriate channel identifier
codes.)
• -L: Left front channel
• -R: Right front channel
• -C: Center front channel
• -Ls: Left surround channel
• -Rs: Right surround channel
• -S: Center surround channel
• -LFE: Low frequency channel (Subwoofer, LFE)
For example, to assign an AIFF file to the left surround channel, rename the file as
filename-Ls.aiff (where filename is the name of your file).
Note: Mac OS X may add a file extension like .aiff. This will not interfere with this channel
assignment method.
This procedure only works when you drag and drop files into the Batch window. If you
drag the files onto the Compressor application icon, they will appear as separate source
files, each in its own job.
Note: If you are creating Dolby Digital Professional (AC-3) surround sound streams, you
will not use all the channels listed in the table at once. See
Audio Tab Settings
for a
diagram of the Dolby audio coding modes.
2
Drag the renamed source audio files to the Batch window.
153
Chapter 12
Creating Dolby Digital Professional Output Files
If the following conditions are met, Compressor automatically collapses the entire group
of files into what appears as a single surround source media file in the Batch window:
• The files in the group must be named correctly. (See the channel identifier codes listed
above.)
• The total number of files in the group must be fewer than seven.
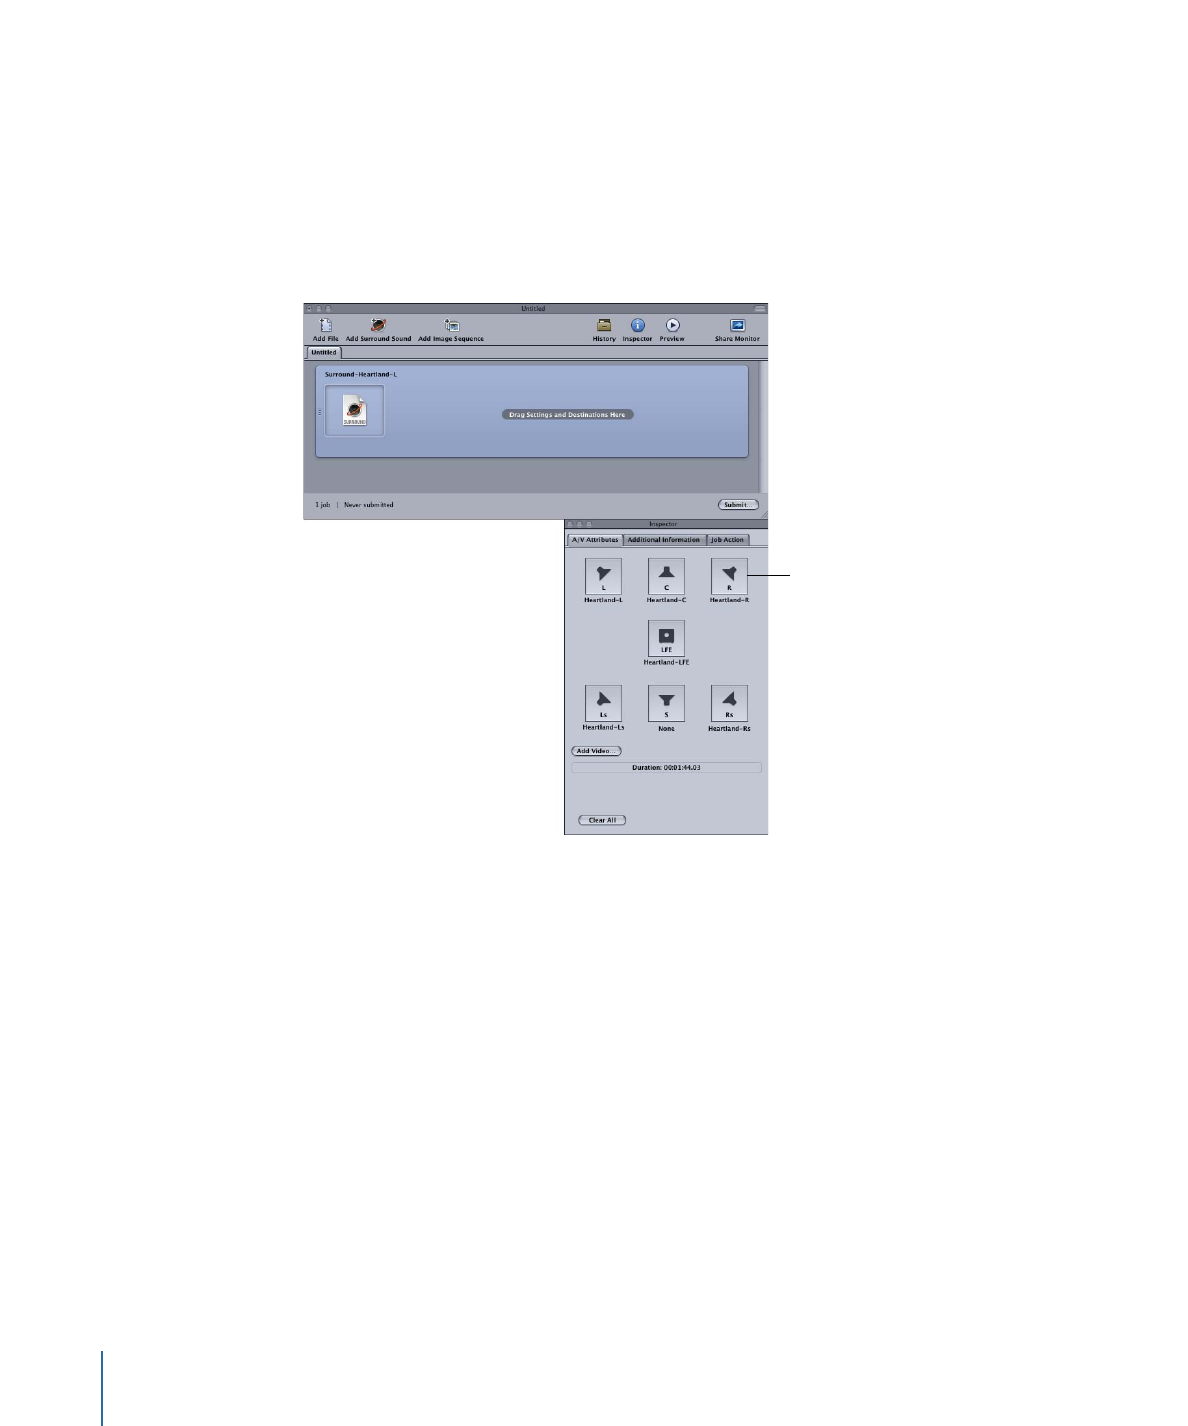
The Inspector window shows the audio files assigned to each channel.
Click a channel’s icon to
change the file assigned
to that channel.
Note: You can click a channel icon in the Inspector window to change the file assigned
to it.
3
Do one of the following to apply the appropriate Apple setting from the Dolby Digital
Professional category to the source audio file’s job:
• Choose Target > New Target With Setting, choose a setting, and click Add.
• In the Batch window, Control-click in an empty part of the job, choose New Target With
Setting from the shortcut menu, choose a setting, and click Add.
• Drag a setting from the Settings tab to the source audio file’s job in the Batch window.
4
Make any necessary adjustments in the Inspector window and click Submit.
Compressor creates an AC-3 surround audio stream. See
About Previewing the Encoder
Settings
for information on playing your AC-3 audio files with Compressor.
154
Chapter 12
Creating Dolby Digital Professional Output Files