Assigning Settings and Destinations
You need to assign at least one setting to each source media file job before you can
submit the batch for processing, but you can also add multiple settings to the same job
to transcode multiple versions of the media file. Each setting-destination pair is known
in Compressor as a target.
19
Chapter 1
Getting Started Quickly

To assign a setting and a destination to a job
1
Choose a setting for your source media file jobs in any of the following ways.
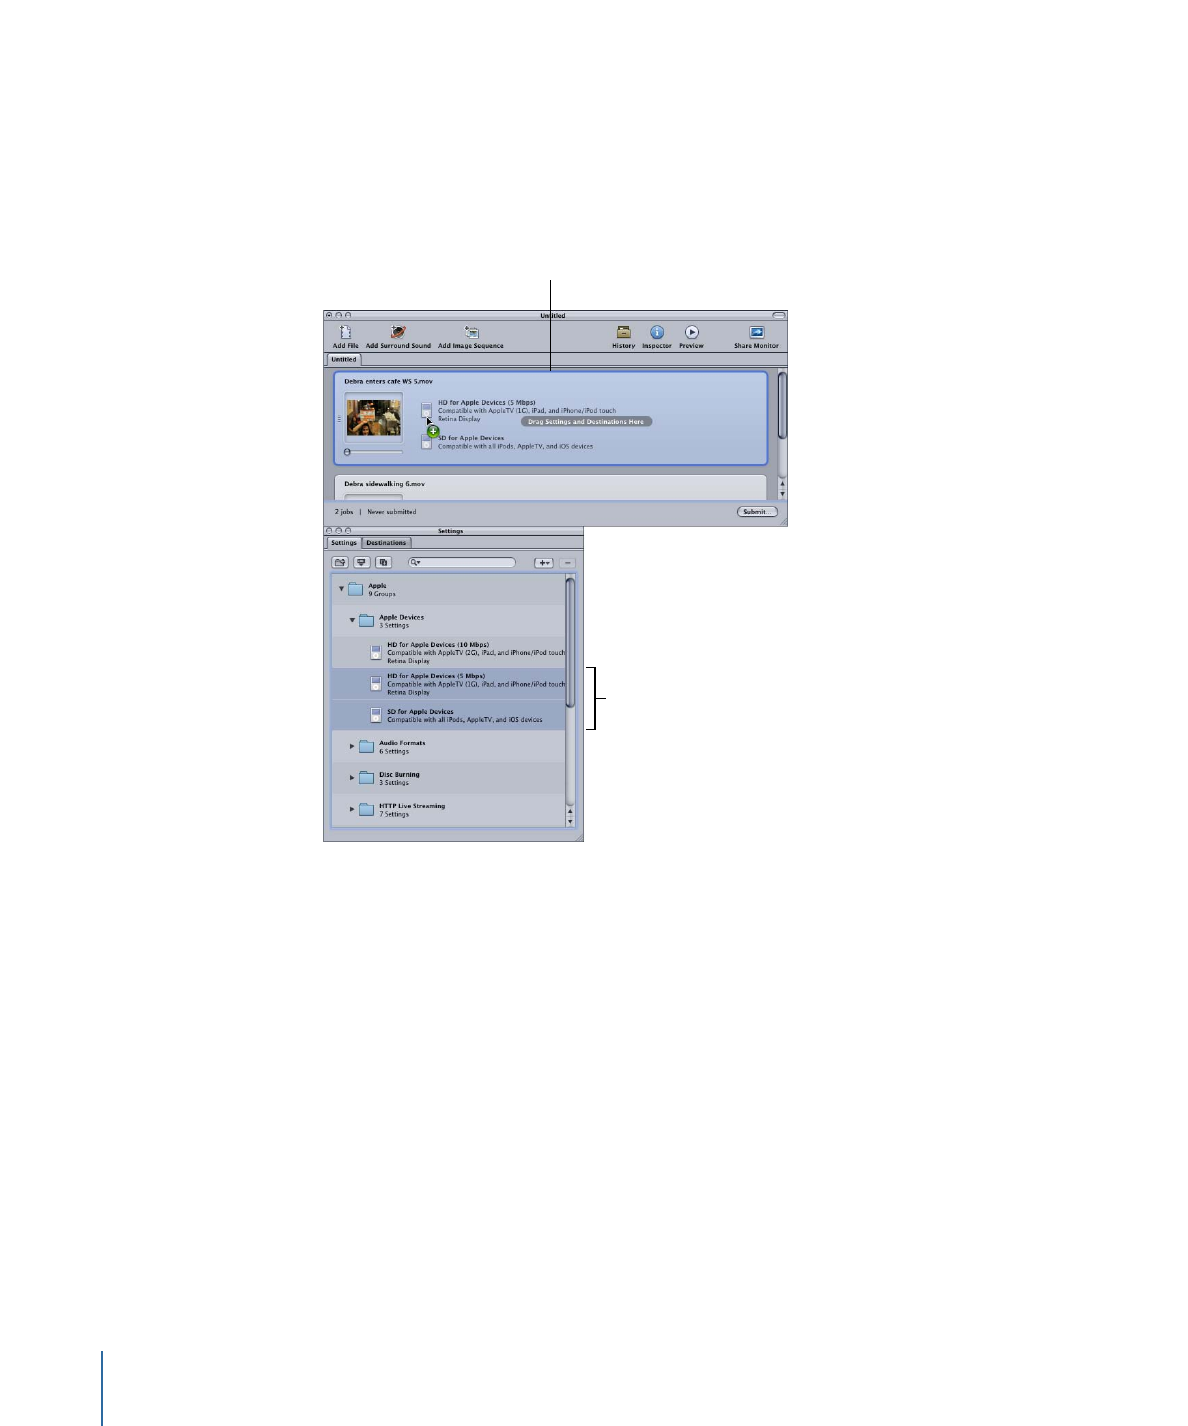
• To assign different settings to different jobs: Drag settings from the Settings tab to
individual jobs in the Batch window.
Select one or more
(two in this case) settings
to apply to the job.
A job with a source
media file in the
Batch window
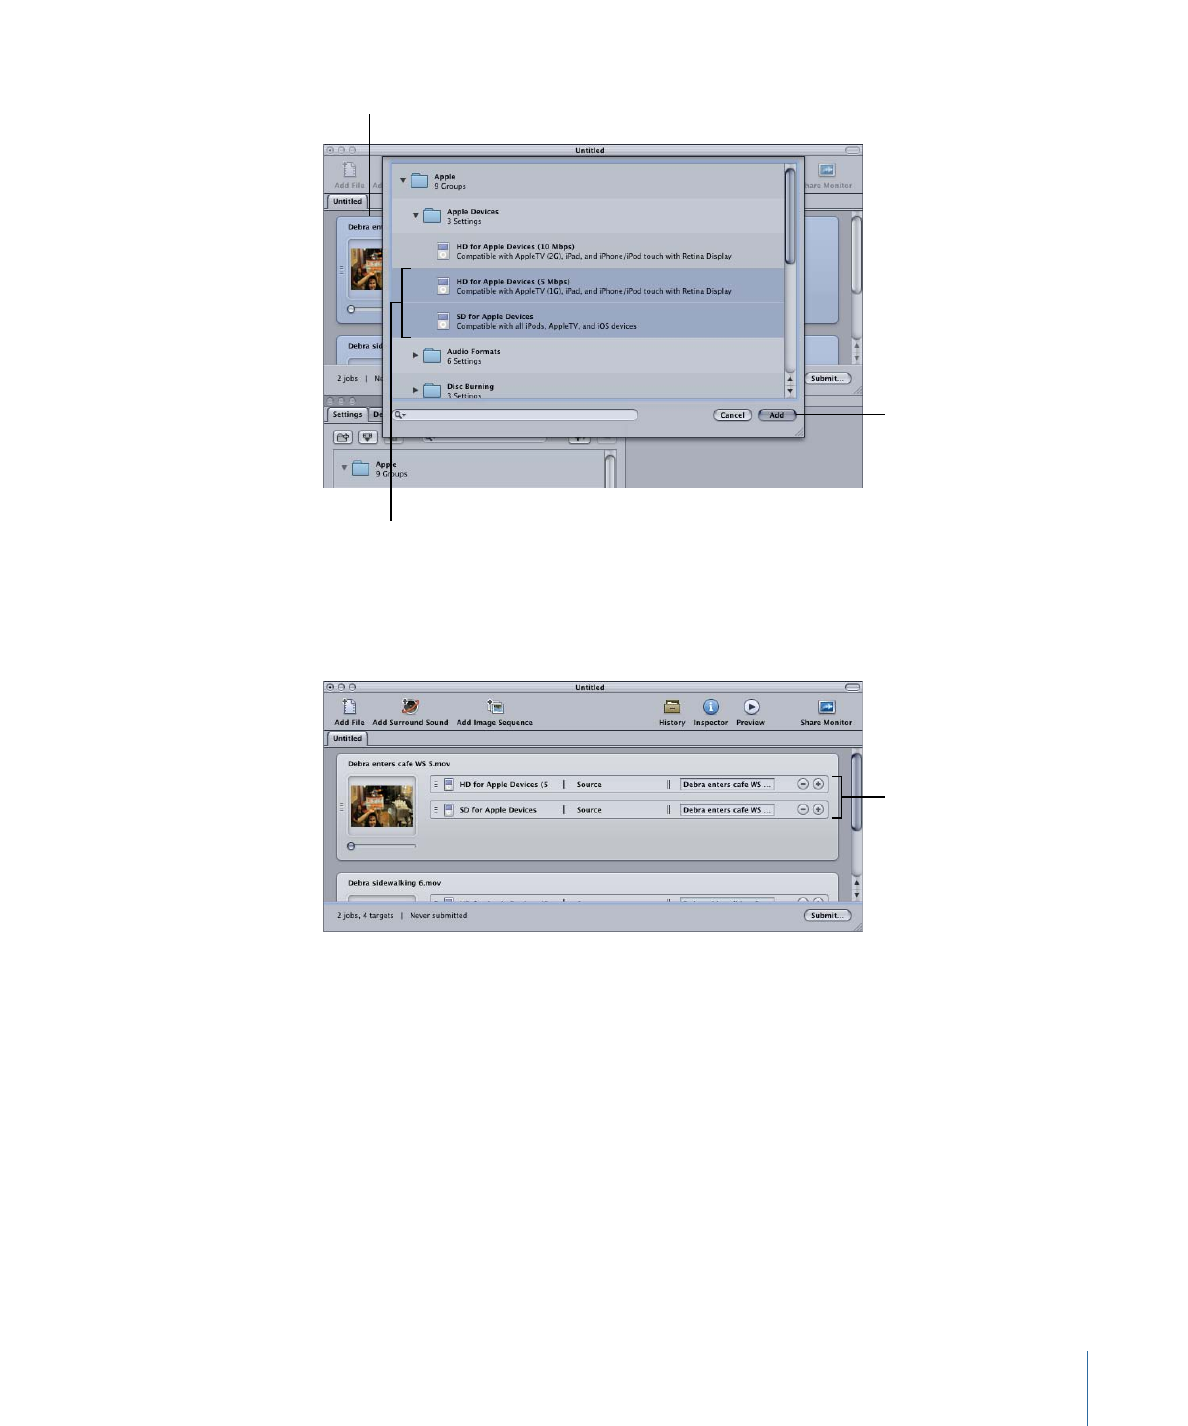
• To assign a single setting to multiple selected jobs: Select the jobs (source media files) in
the Batch window and choose Target > New Target With Setting. This opens a settings
selection dialog over the Batch window.
20
Chapter 1
Getting Started Quickly

Click Add to assign
the settings to the
selected jobs.
Select the settings
to apply to the
selected jobs.
Select the jobs in
the Batch window.
Choose one or more settings, using the disclosure triangles to reveal individual settings,
and click Add. The chosen settings are assigned to all the selected jobs.
New targets are added
for each setting you
drag to the job.
You can also choose Edit > Select All to select all the jobs before applying the settings.
See
Creating, Previewing, and Modifying Settings
for more information on settings,
and
Finalizing Jobs and Submitting Batches
for more information about working with
jobs and targets.
The next step is to set the destination. By default, the destination is set to Source, which
writes the output files to the same folder as the source files originated from. You can
change the destination for organization purposes or to take advantage of larger and
faster hard disks.
Note: You can choose a default destination from the Compressor Preferences window.
See
Setting Compressor Preferences
for more information.
You can set the destination for each individual target or for a selected group of targets.
21
Chapter 1
Getting Started Quickly

2
Choose a destination for your job’s targets in one of the following ways.
• Do nothing: Accept the default destination Source (the same folder as the source media
files originated from) specified in the Destination column.
• Use the target’s shortcut menu to change one setting at a time: Control-click the target
you want to change and then choose any of the preexisting destinations available to
you from the Destination submenu.
Use the target’s shortcut
menu to change the
destination for the
selected targets.
You can also choose Other from the shortcut menu to open a dialog to choose any
location available to your computer as the destination.
Note: Choosing Other allows you to choose any location currently accessible from your
desktop, including a mounted open volume. However, this volume must remain open
until the batch has been transcoded.
You can select multiple targets and change all their destinations at once using the same
method. You can also use the Destination submenu of the target’s shortcut menu to
choose a destination, or drag a destination from the Destinations tab to the target.
See
Creating and Changing Destinations
for more information on destinations.
3
You can name the batch, and save it, by choosing File > Save.
Stage 3: