
Stage 1: Choosing Video Format Settings
•
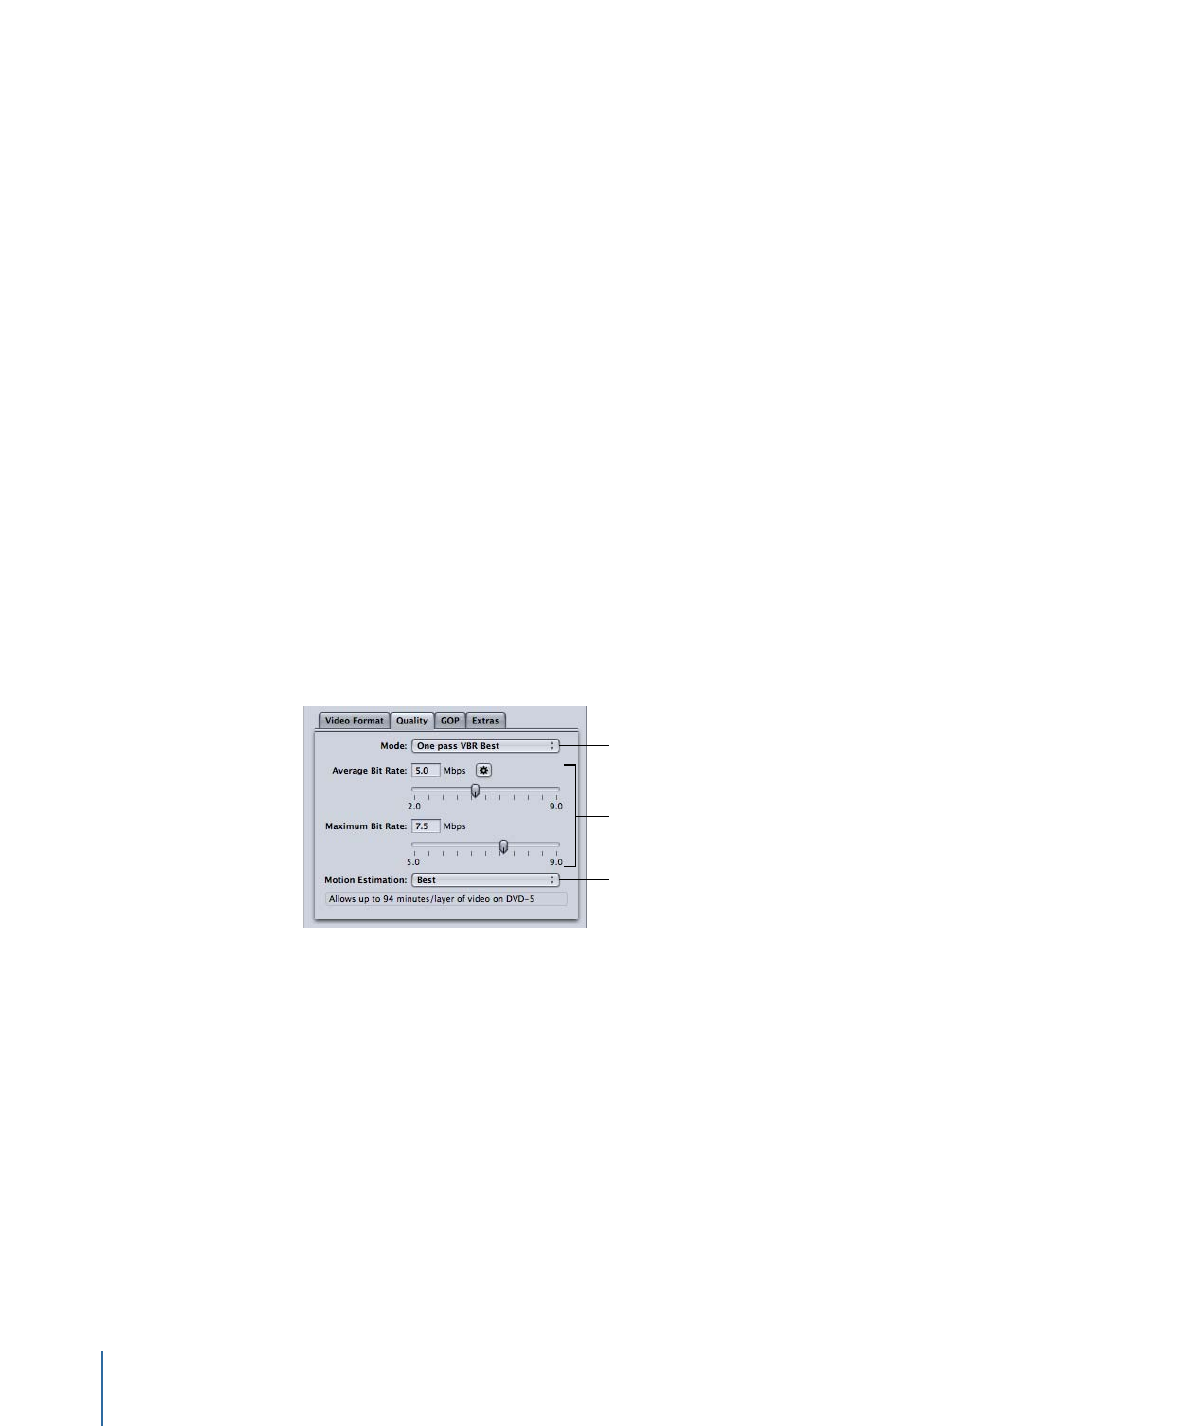
Stage 2: Choosing Quality Settings
•
Stage 3: Choosing GOP Settings
•
Stage 4: Choosing Extras Settings
Stage 1:
Choosing Video Format Settings
It’s important to match the video format, aspect ratio, and field dominance to those of
your source media file. See
Video Format Tab
for a more detailed description of each of
these settings.
Note: The easiest way to make sure you are matching the source media file is to activate
the Automatic buttons. See
About the Automatic Settings
for more information.
To open the MPEG-2 Encoder pane and choose Video Format settings
1
Open the Settings tab, then choose MPEG-2 from the Add Preset (+) pop-up menu button.
210
Chapter 18
Creating MPEG-2 Output Files
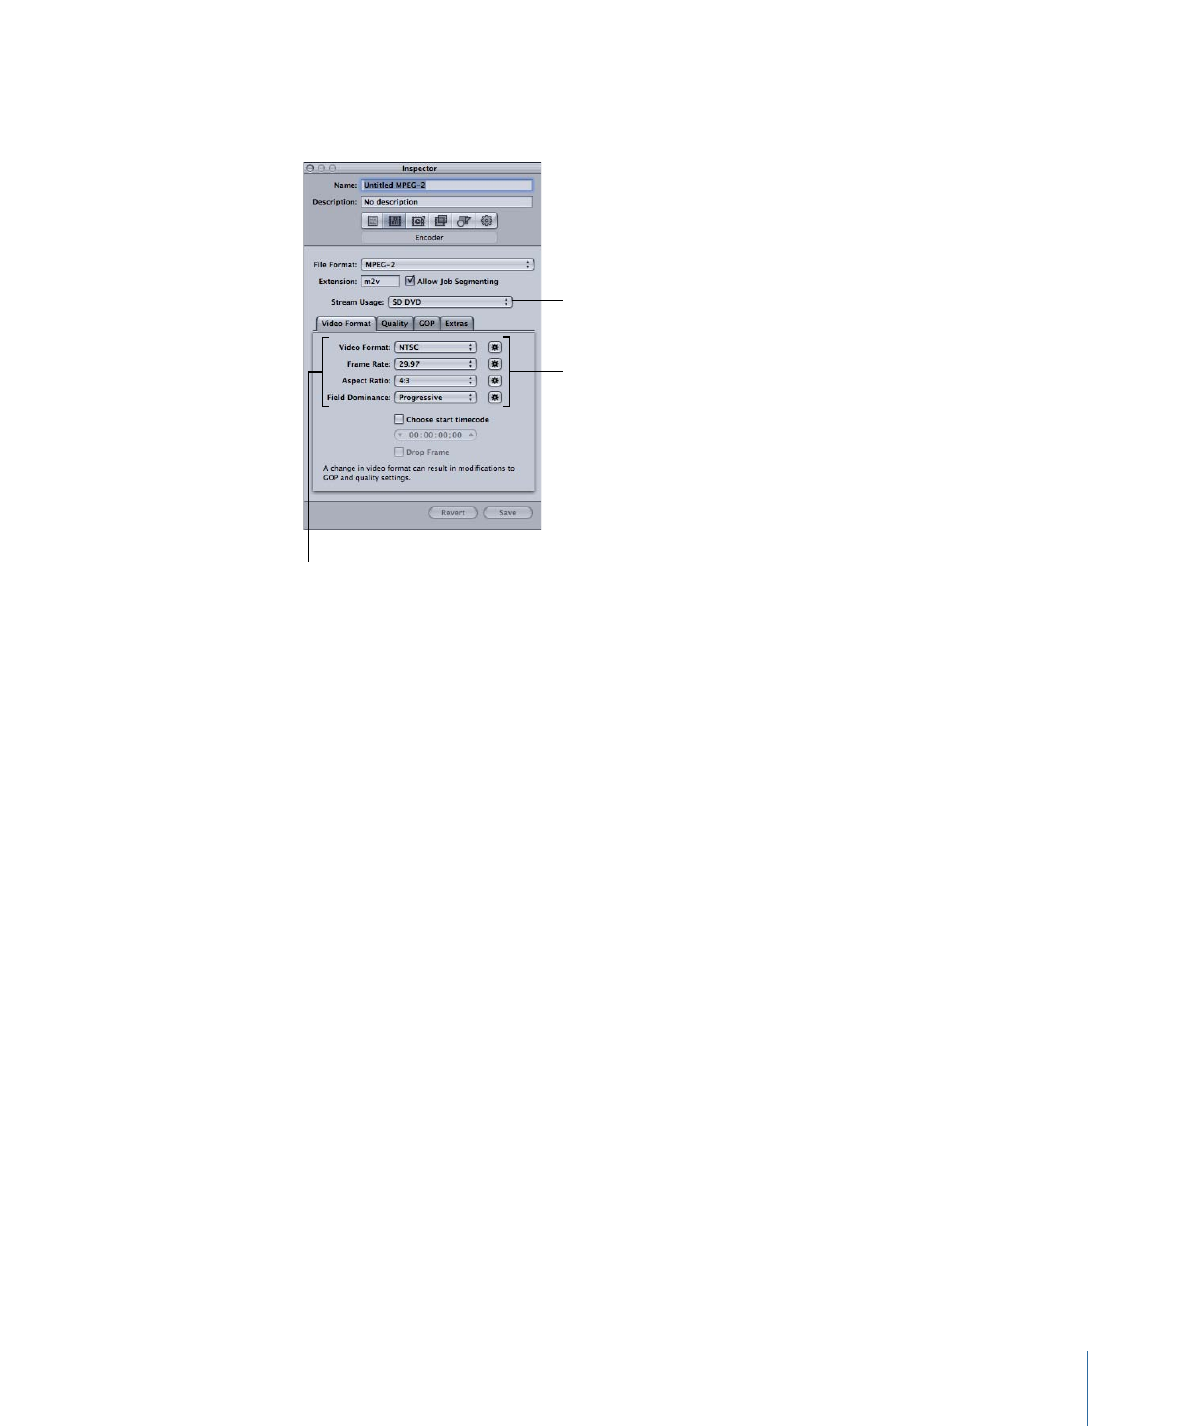
The MPEG-2 Encoder pane opens in the Inspector window with the default Video Format
tab displayed.
Manually configure these
settings if you do not
intend to match the
source media file.
Select the Automatic
buttons to have the
encoder match the
source media file.
Choose the type
of MPEG-2 stream
to create.
2
Choose the setting from the Stream Usage pop-up menu that matches how you intend
to use the encoded video. This ensures that the MPEG-2 encoding options are restricted
to those that are supported by your intended usage. The options include:
• Generic
• SD DVD
• Blu-ray
3
Choose a format from the Video Format pop-up menu or select its Automatic button:
• NTSC (default)
• PAL
• 720p
• HD 1440x1080
• HD 1920x1080
• 640x480
• 640x360
• 640x352
• 640x384
• 640x320
211
Chapter 18
Creating MPEG-2 Output Files
4
Choose an aspect ratio from the Aspect Ratio pop-up menu or select its Automatic button.
You must determine whether the intended shape of your source video is 4:3 (normal) or
16:9 (widescreen) before you can choose your aspect ratio.
5
Choose a field dominance setting based on your source media type from the Field
Dominance pop-up menu. For example, for DV choose Bottom First. Or choose the Field
Dominance Automatic button to let Compressor determine the correct setting.
6
If you want to use the timecode from your source video, leave the “Choose start timecode”
checkbox unselected. Otherwise, select this checkbox and enter a new timecode.
7
If you have selected the “Choose start timecode” checkbox, and if your video format is
NTSC, select the “drop frame” checkbox if you want to use drop frame (rather than
non-drop frame) timecode.
See
Video Format Tab
for more information.
Stage 2: