QuickTime Movie Encoder Pane Basic Settings
Use these basic options to control the more specific QuickTime movie settings, below.
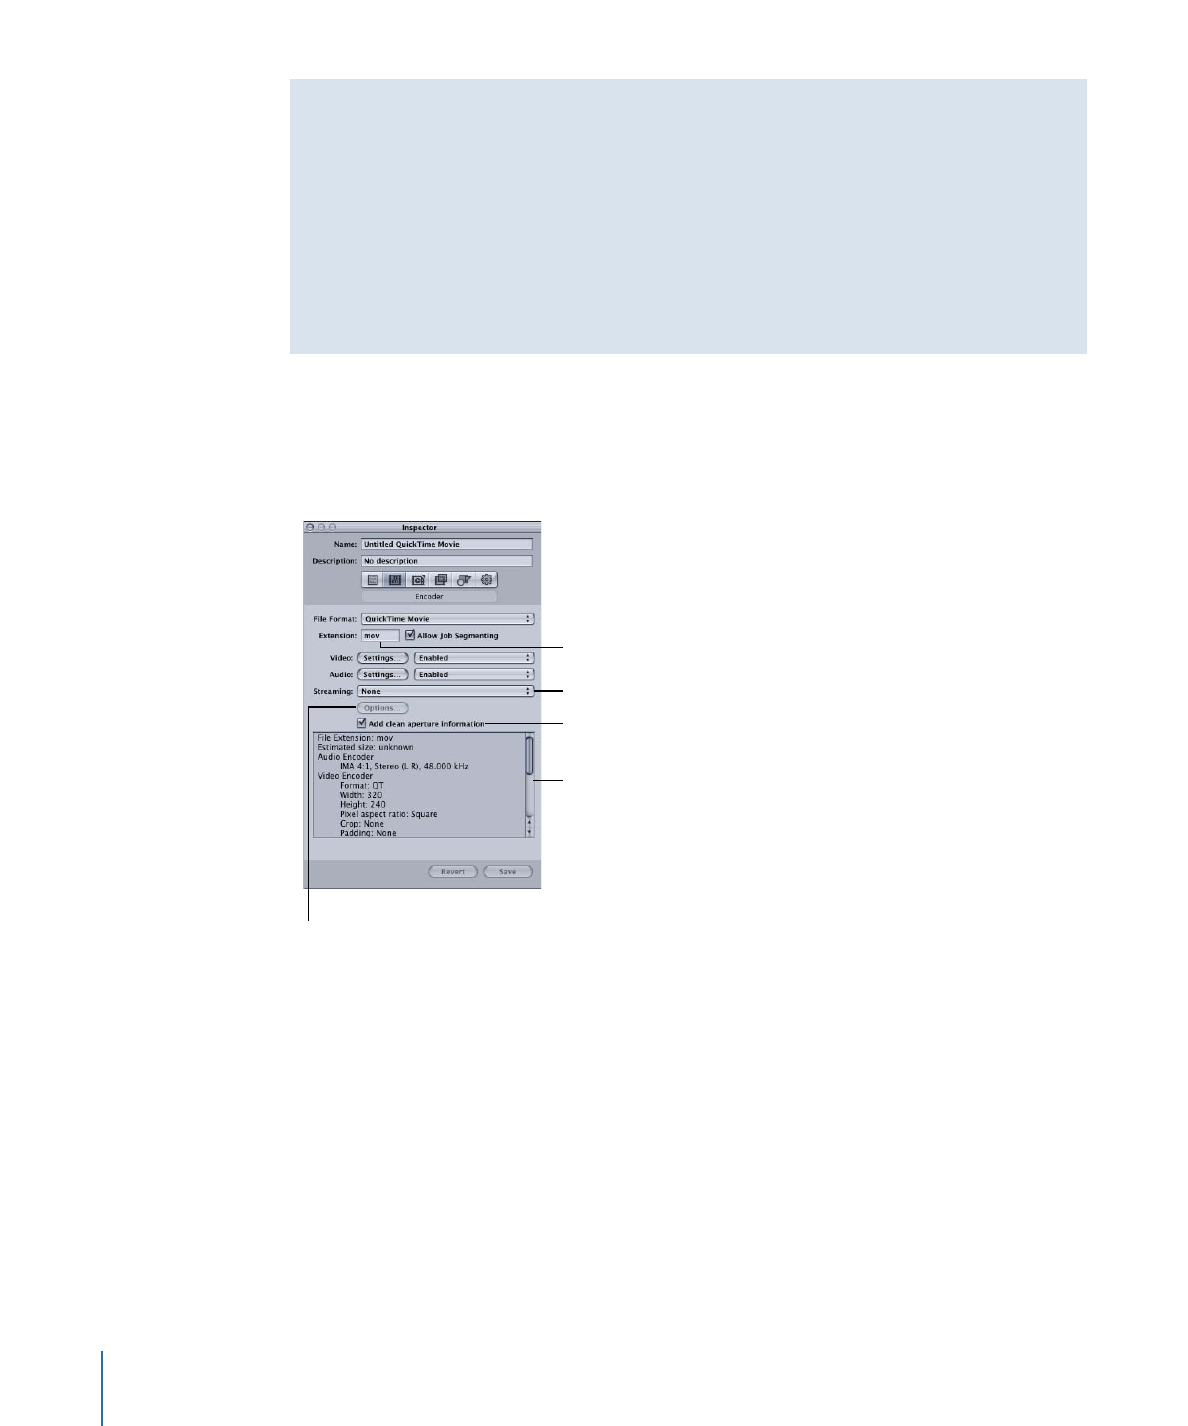
• File Extension field: This field displays the QuickTime file extension (.mov) automatically
after the QuickTime output format is chosen from the File Format pop-up menu or the
(+) pop-up menu in the Settings tab.
• Allow Job Segmenting: This checkbox allows you to turn off job segmenting. It is relevant
only if you are using Compressor with distributed processing and with multi-pass
encoding. For more information, see
Job Segmenting and Two-Pass or Multi-Pass
Encoding
.
234
Chapter 21
Creating QuickTime Movie Output Files

• Video Settings and Audio Settings: These buttons open the QuickTime Compression
Settings and Sound Settings dialogs. Use these dialogs to select suitable codecs and
change other video or audio compression settings. See
About the Sound Settings Dialog
and
About the Compression Settings Dialog
for more information on these dialogs.
• Enabled/Disabled/Pass-through: Use these pop-up menus to enable or disable Video
and Audio settings. Enabled means the video or audio track will be included in the
output movie. Disabled means the video or audio track will be excluded from the output
movie. Pass-through (audio only) means Compressor will copy the audio into the output
movie without modifying it. An example of this might involve HD (high definition) files
with multitrack audio that you want to convert to SD (standard definition) files without
disturbing the audio tracks.
Note: If you export a sequence from Final Cut Pro to Compressor (File > Export > Using
Compressor) and apply a setting with “Pass-through” selected, the audio portion of
the setting will change to a PCM setting with the sequence’s setting and channel count,
but with only a single track created on output. If you require audio passthrough for a
Final Cut Pro sequence, export a QuickTime movie (File > Export > QuickTime Movie)
and then import the movie into Compressor.
Important:
If a setting has “Pass-through” selected, the Filter pane audio filters are not
available. Additionally, the Frame Controls pane retiming controls will not correct the
audio, potentially causing synchronization errors with the video.
• Streaming: Choose a QuickTime streaming option from this pop-up menu.
• None: If you choose this setting (the default), your output media file will not stream
over the Internet.
• Fast Start: This option allows your output media file to be viewed even before it is
fully downloaded from its server.
• Fast Start-Compressed Header: This setting achieves the same results as Fast Start
(allowing your output media file to be viewed before it is fully downloaded from the
server), but the output media files are smaller.
• Hinted Streaming: This setting allows hint tracks to be added to the output media
file so that it can be used with a QuickTime Streaming Server.
• Options button: This button remains dimmed unless Hinted Streaming is chosen from
the Streaming pop-up menu. Clicking this button opens the QuickTime Hint Exporter
Settings dialog, which allows you to choose extra hinting settings for your stream.
• Add clean aperture information checkbox: This checkbox (selected by default) allows
you to choose whether to add information that defines clean picture edges to the
output file.
235
Chapter 21
Creating QuickTime Movie Output Files

Note: This checkbox does not affect the actual pixels in the output file—it only controls
whether information is added to the file that a player can use to hide the edges of the
picture.
• If the checkbox is selected: Information is added to the output file that defines how
many pixels to hide to ensure that no undesirable artifacts appear along the edges.
When the output file is played using QuickTime Player, this setting can result in the
pixel aspect ratio being slightly altered.
• If the checkbox is not selected: No clean aperture information is added to the output
file. This was the standard behavior in Compressor 3.0.5 and earlier.
• Summary table: Displays full details for this setting.