Setting Compressor Preferences
5

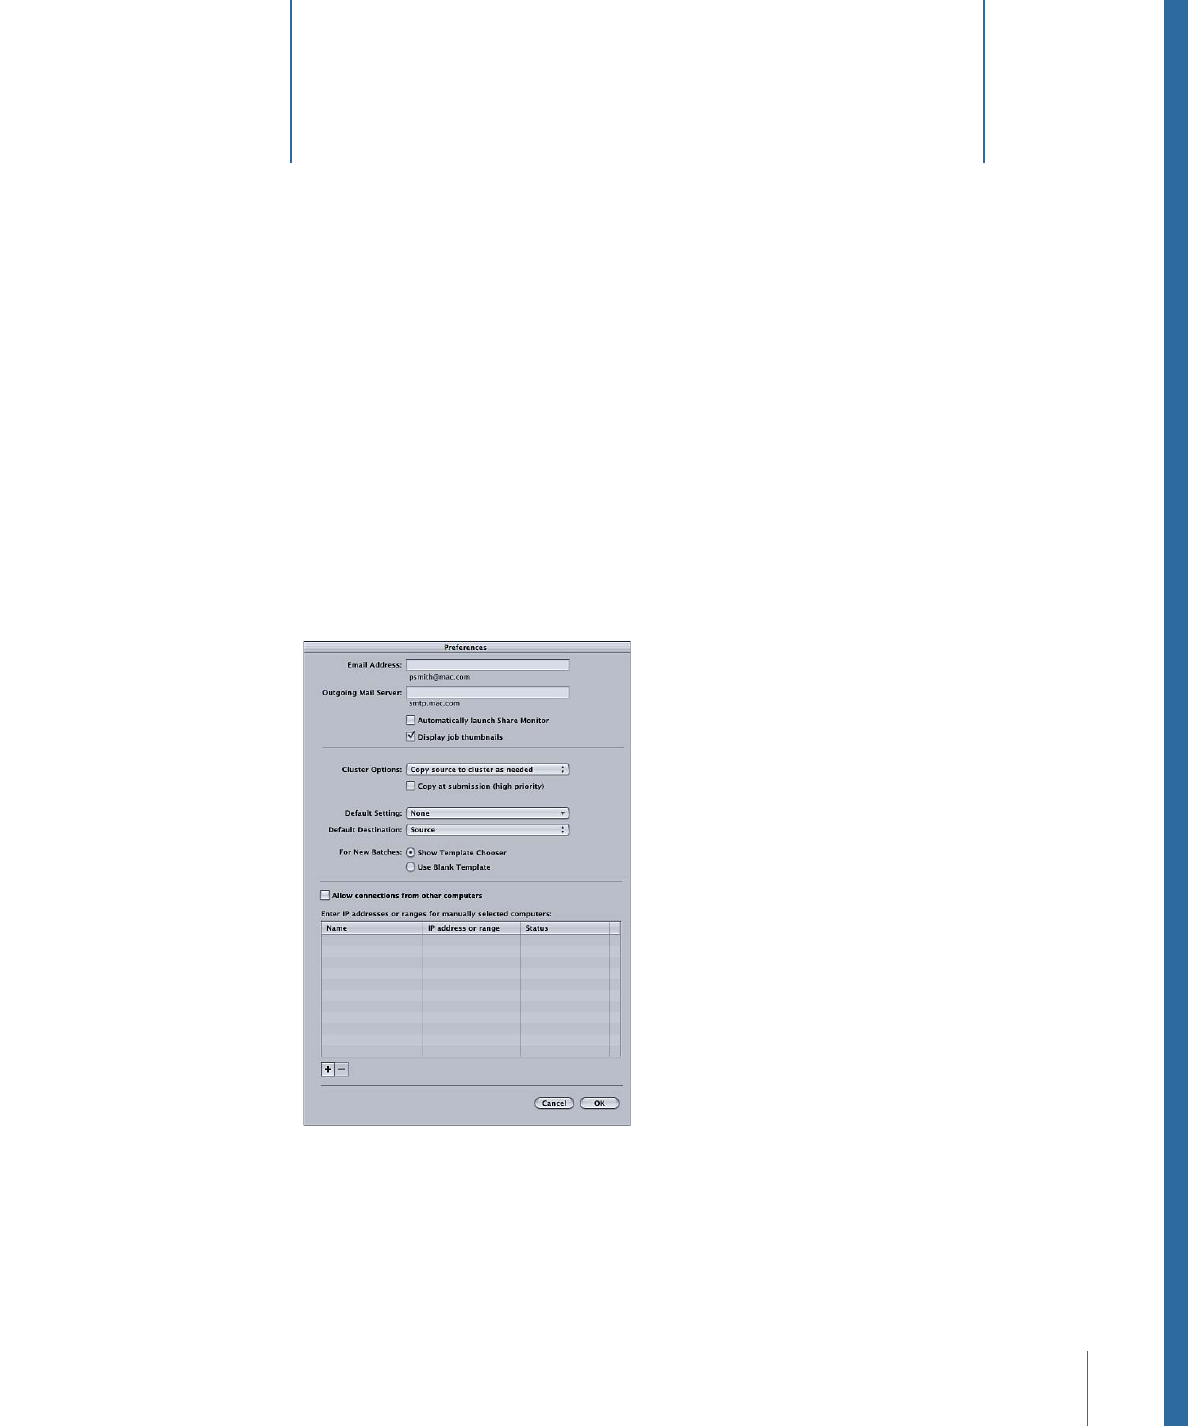
• Outgoing Mail Server: For more information about email notification, see
Working with
Post-Transcoding Actions
.
• Automatically launch Share Monitor: Use this checkbox to control whether Share Monitor
automatically opens when you submit a batch.
• Display job thumbnails: Use this checkbox to control whether thumbnail images are
displayed for jobs in a batch.
• Cluster Options: Choose one of the following to control cluster options (for distributed
processing scratch storage settings).
• Copy source to cluster as needed: Instructs Compressor to copy source files to a
cluster’s scratch storage location as needed.
• Always copy source to cluster: Requires Compressor to always copy source files to a
cluster’s scratch storage location.
• Never copy source to cluster: Prevents Compressor from copying source files.
• Never copy files to/from cluster: Prevents Compressor from copying any files. Either
all the files are in the correct locations, or the batch fails.
• Copy at submission (high priority): Use this checkbox to control whether Compressor
transfers Source files to the processing cluster immediately.
• Default Setting: Use the Default Setting pop-up menu to choose from the list of existing
settings.
• Default Destination: Use the Default Destination pop-up menu to choose from the list
of existing destinations.
• For New Batches: Choose one of the following options for setting the Compressor
startup screen.
• Show Template Chooser: Compressor opens with the Batch Template Chooser on
startup.
• Use Blank Template: Compressor opens with an empty untitled batch with a
placeholder job.
• Allow connections from other computers: Use this checkbox to control whether remote
computers running Share Monitor can view this computer’s job status. Share Monitor
on the remote computer only needs to know the IP address or hostname. (There is no
password to enter.)
• Enter IP addresses or ranges for manually selected computers: This table displays
information about remote host computers.
• Add/Remove button: Use this button to add or remove information about remote host
computers.
72
Chapter 5
Setting Compressor Preferences
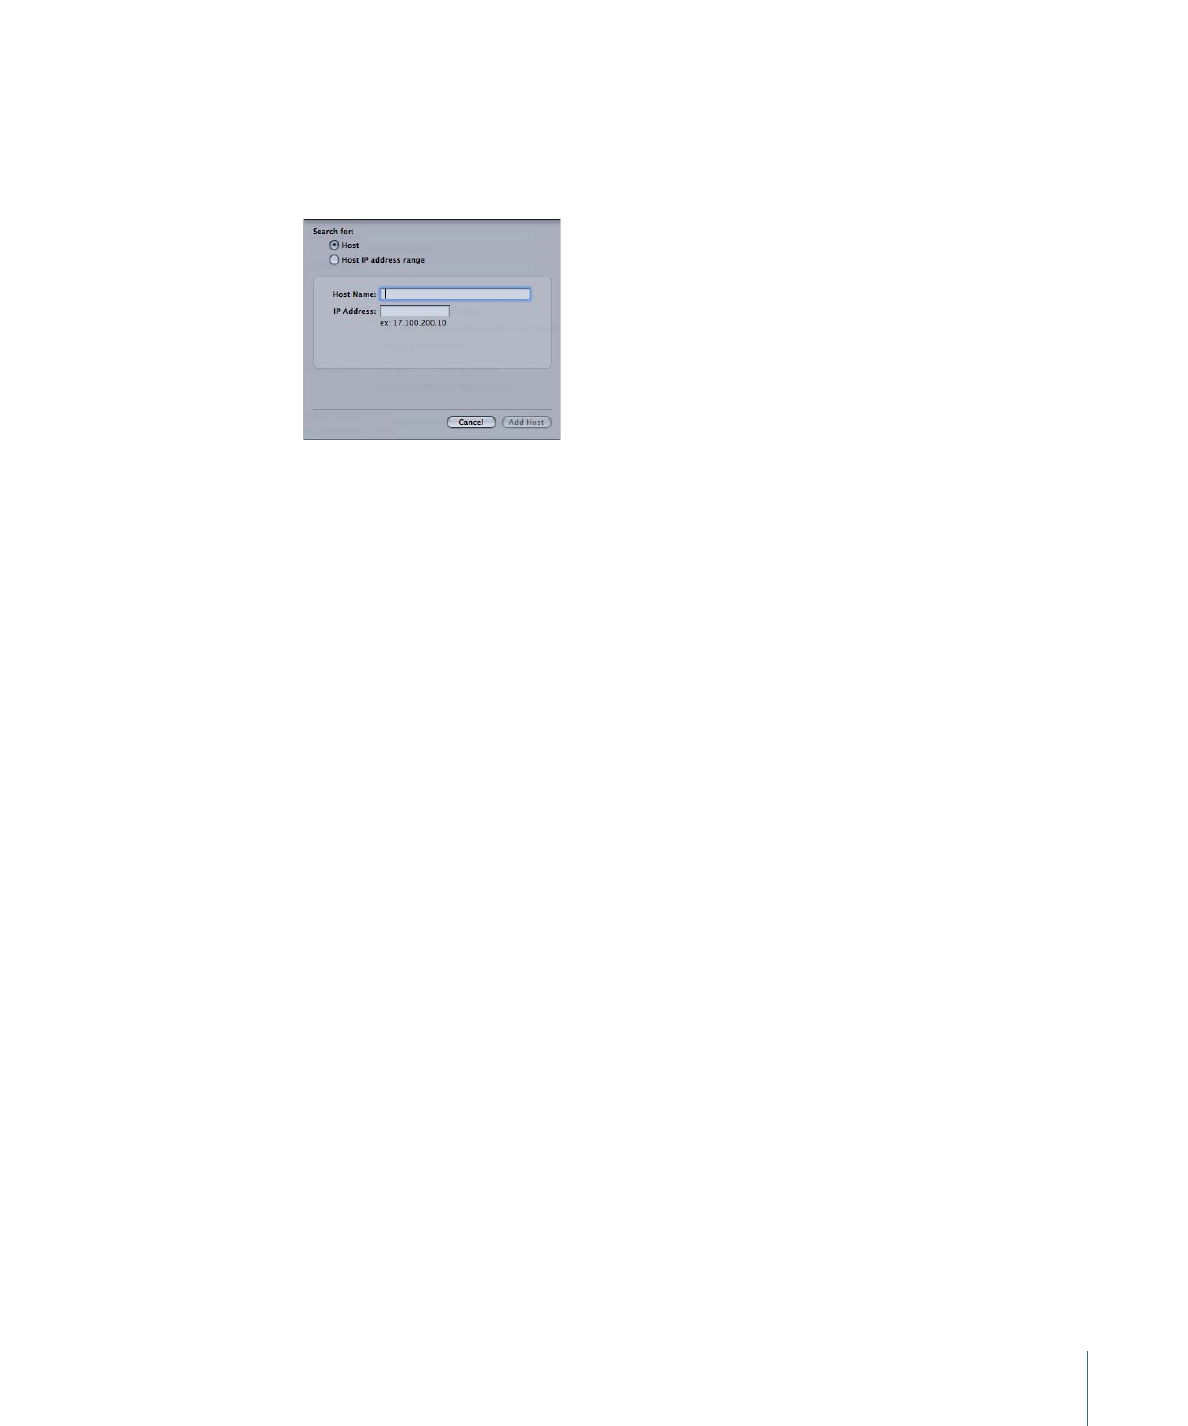
Remote Computer Address Dialog
The remote computer address dialog is displayed when you click the Add/Remove button
in the main Compressor Preferences window. Use this window to enter IP addresses or
ranges for manually selected computers.
This dialog contains the following controls:
• Host/Host IP address range buttons: These buttons control whether this dialog is in IP
Address mode (in which you enter a specific address) or IP Address Range mode (in
which you enter a range of addresses).
• Host: Use this mode to enter a host name and IP address for a specific remote
computer.
• Host IP address range: Use this mode to enter a name and set of range numbers
(Range From, Range To) for a range of remote IP addresses.
73
Chapter 5
Setting Compressor Preferences