Using Compressor Preferences
Follow the instructions below to set Compressor preferences.
To open Compressor preferences
µ
Choose Compressor > Preferences, or press Command-Comma (,).
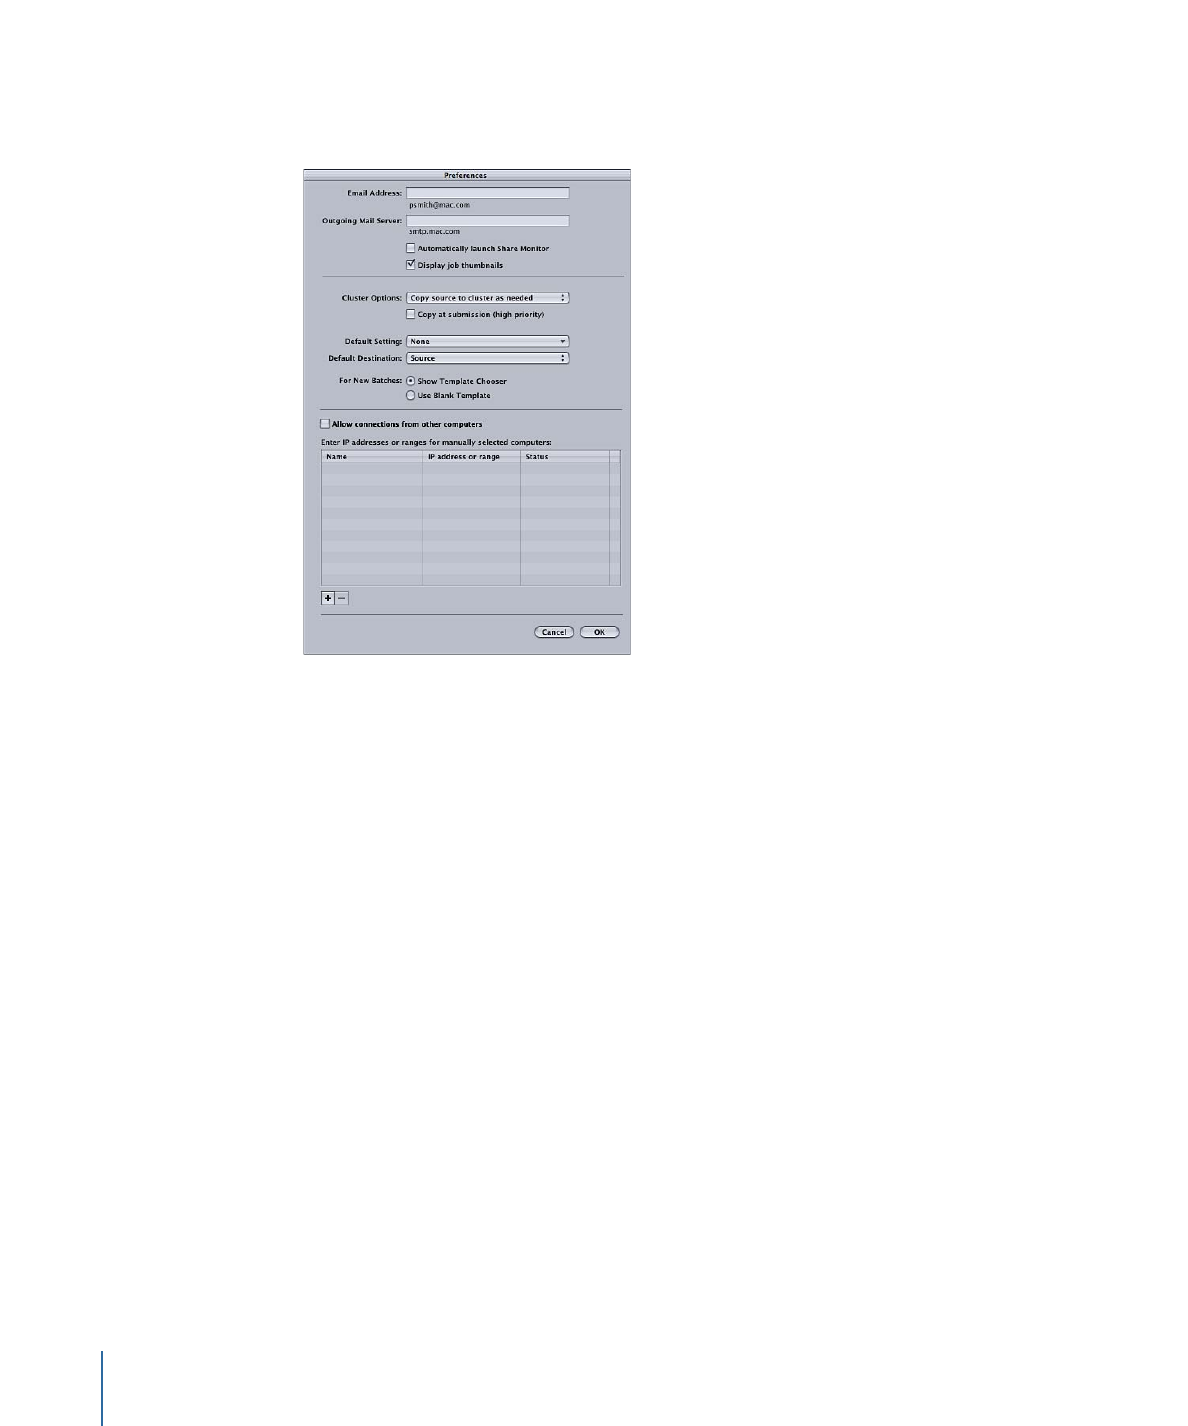
The Preferences window appears.
To configure the email notification preference
1
Enter the default email address to use when email notification is activated.
You can change this address in the Actions pane of the Inspector window.
2
Enter the mail server used by this computer for outgoing email.
For more information about email notification, see
Working with Post-Transcoding Actions
.
To set whether or not Share Monitor automatically opens
Do one of the following:
µ
Select the “Automatically launch Share Monitor” checkbox to have Share Monitor
automatically open when you submit a batch.
µ
Deselect the “Automatically launch Share Monitor” checkbox to prevent Share Monitor
from automatically opening. You can still manually open Share Monitor from the Batch
window.
To control whether thumbnail images are displayed for each job in a batch
µ
Select “Display job thumbnails” to have Compressor display the images.
74
Chapter 5
Setting Compressor Preferences

µ
Deselect “Display job thumbnails” to have Compressor not display the images.
To control cluster options (for distributed processing scratch storage settings)
µ
Choose an option from the Cluster Options pop-up menu:
• Copy source to cluster as needed: Instructs Compressor to copy source files to a cluster’s
scratch storage location as needed.
• Always copy source to cluster: Requires Compressor to always copy source files to a
cluster’s scratch storage location.
• Never copy source to cluster: Prevents Compressor from copying source files.
• Never copy files to/from cluster: Prevents Compressor from copying any files. Either all
the files are in the correct locations, or the batch fails.
To control whether Compressor transfers Source files to the processing cluster
immediately
Do one of the following:
µ
Select “Copy at submission (high priority)” to have Compressor transfer source files
immediately.
µ
Deselect “Copy at submission (high priority)” to prevent Compressor from transferring
source files immediately.
To control the default setting
µ
Use the Default Setting pop-up menu to choose from the list of existing settings.
The setting you choose appears as the default setting when you import a new source file
in the Batch window.
To change the default destination
µ
Use the Default Destination pop-up menu to choose from the list of existing destinations.
The destination you choose appears as the default destination when you import a new
source file in the Batch window.
To control whether Compressor displays the Batch Template Chooser on startup
µ
Select Show Template Chooser to display the Batch Template Chooser on startup.
µ
Select Use Blank Template to not display the Batch Template Chooser on startup.
To control whether other computers with Share Monitor can view this computer’s job
status
µ
Select “Allow connections from other computers” to allow remote computers running
Share Monitor to monitor this computer’s job status.
The remote computer needs to know this computer’s IP address or hostname. (There is
no password.)
75
Chapter 5
Setting Compressor Preferences

To enter IP addresses or ranges for remote host computers
1
Click Add (+) at the bottom of the Compressor Preferences window.
The host address dialog appears.
2
In the host address dialog, do one of the following:
• Select Host, complete the Host Name and IP Address fields, and click Add Host.
Note: You can also enter only the host name or the IP address and press the Tab key.
If a corresponding host name or IP address is found, the match is entered in the field
automatically.
• Select “Host IP address range,” complete the Range fields, and click Add Range.
The hosts or host ranges appear in the Host table in the main Preferences dialog.
Important:
Any changes you make to the Compressor preference settings take effect
only when you click OK. If you make changes but decide not to use them, click Cancel.
76
Chapter 5
Setting Compressor Preferences
The first step in the traditional Compressor transcoding process is to import at least one
source media file into the Batch window.
Note: If you are using the batch template workflow, the first step would be to choose a
batch template. For more information about the simple batch template workflow, see
Quick and Easy Compressor Workflow: Batch Template Method
.
This chapter covers the following:
•
About the Batch Window
(p. 77)
•
Adding Source Media Files to a Batch to Create Jobs
(p. 81)
•
Using the Inspector with Source Media Files
(p. 89)
•
Tips on Importing Source Media Files
(p. 92)
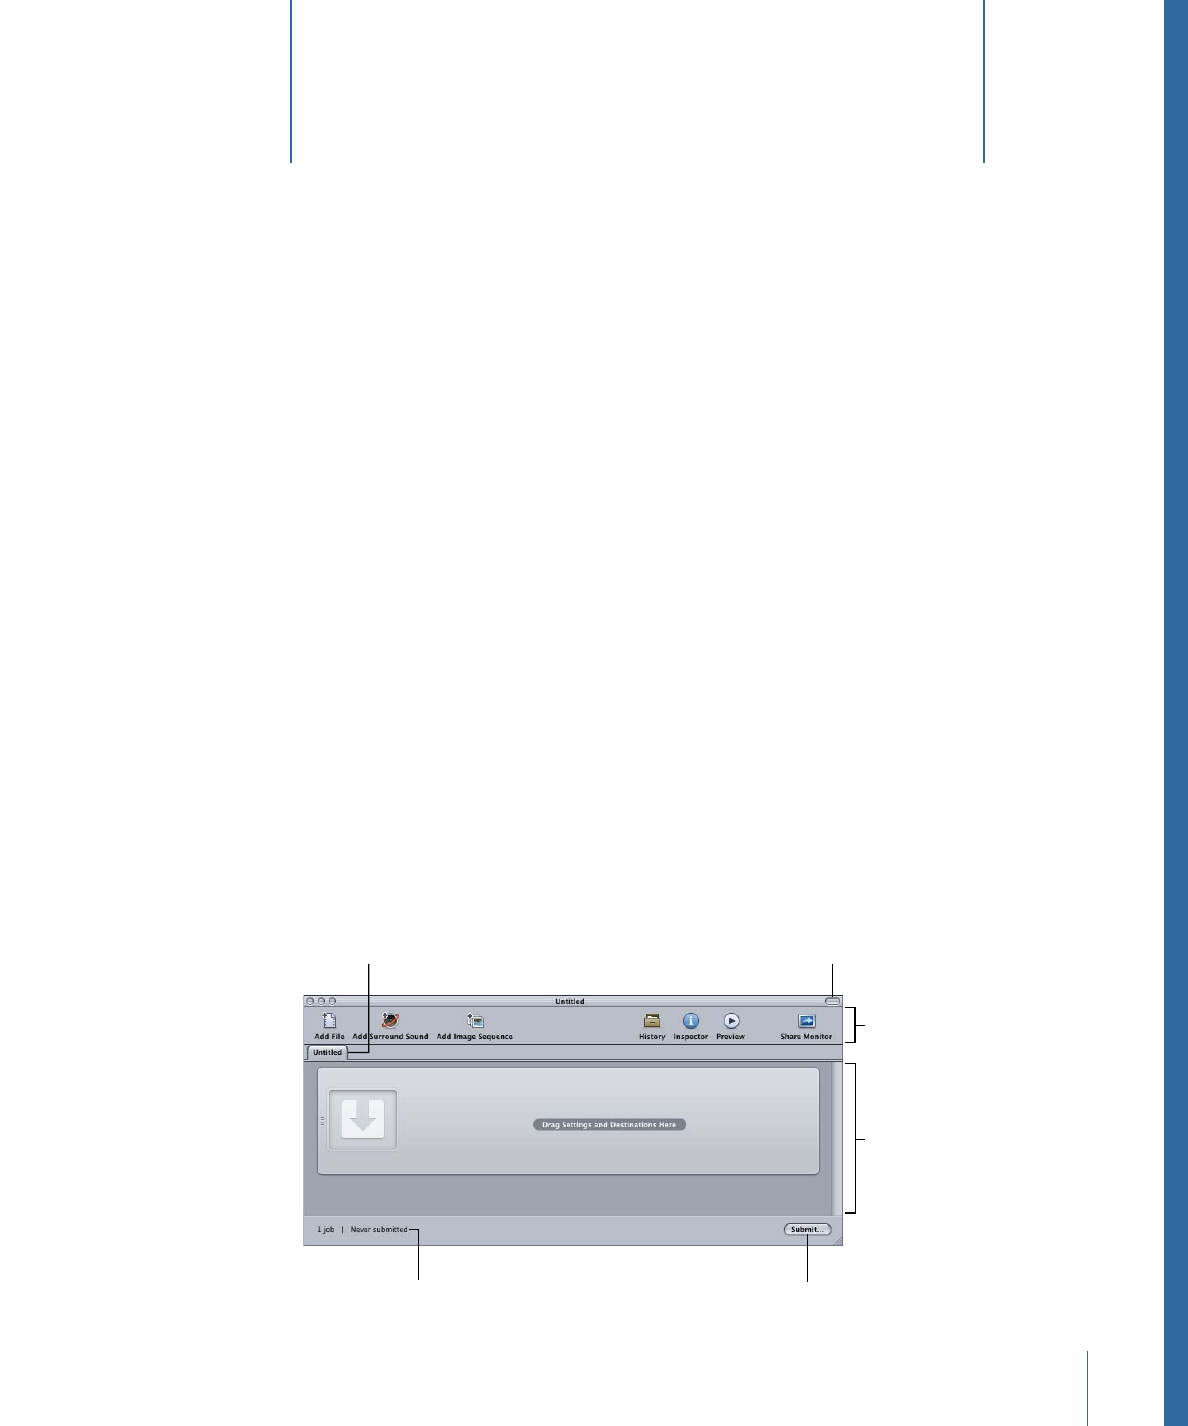
About the Batch Window
The Batch window provides a central location for organizing your transcoding tasks and
quickly assigning settings. When you first open Compressor, an untitled Batch window
appears. Think of batches as documents that can be saved, closed, and opened again.
You use the toolbar at the top of the Batch window to open all other task windows.
Job area
Toolbar
Batch tabs
Batch status
Show/hide
toolbar button
Batch submission button
77