
Previewing a Clip
You can preview either the original source media file or the file with a setting applied to
it. Source media files appear in the list as their filenames. Any settings that have been
applied to the source media file are listed immediately below the file’s name and are
indented to make it easier to identify them. Whether you choose to view the original
source media file or the source media file with a setting determines which options you
see in the Preview window.
Important:
Settings you make in the Encoder pane and the Frame Controls pane cannot
be previewed. Only the settings made in the Filters pane and Geometry pane can be
previewed. See
Transcoding a Portion of the Clip with the Preview Window
for an
alternative method of previewing Encoder pane and Frame Controls pane settings.
To preview a source media file
1
Open the Preview window.
311
Chapter 26
Using the Preview Window
Note: You can open your file into the Preview window in one step by double-clicking
the source media file in its job in the Batch window.
2
Do one of the following:
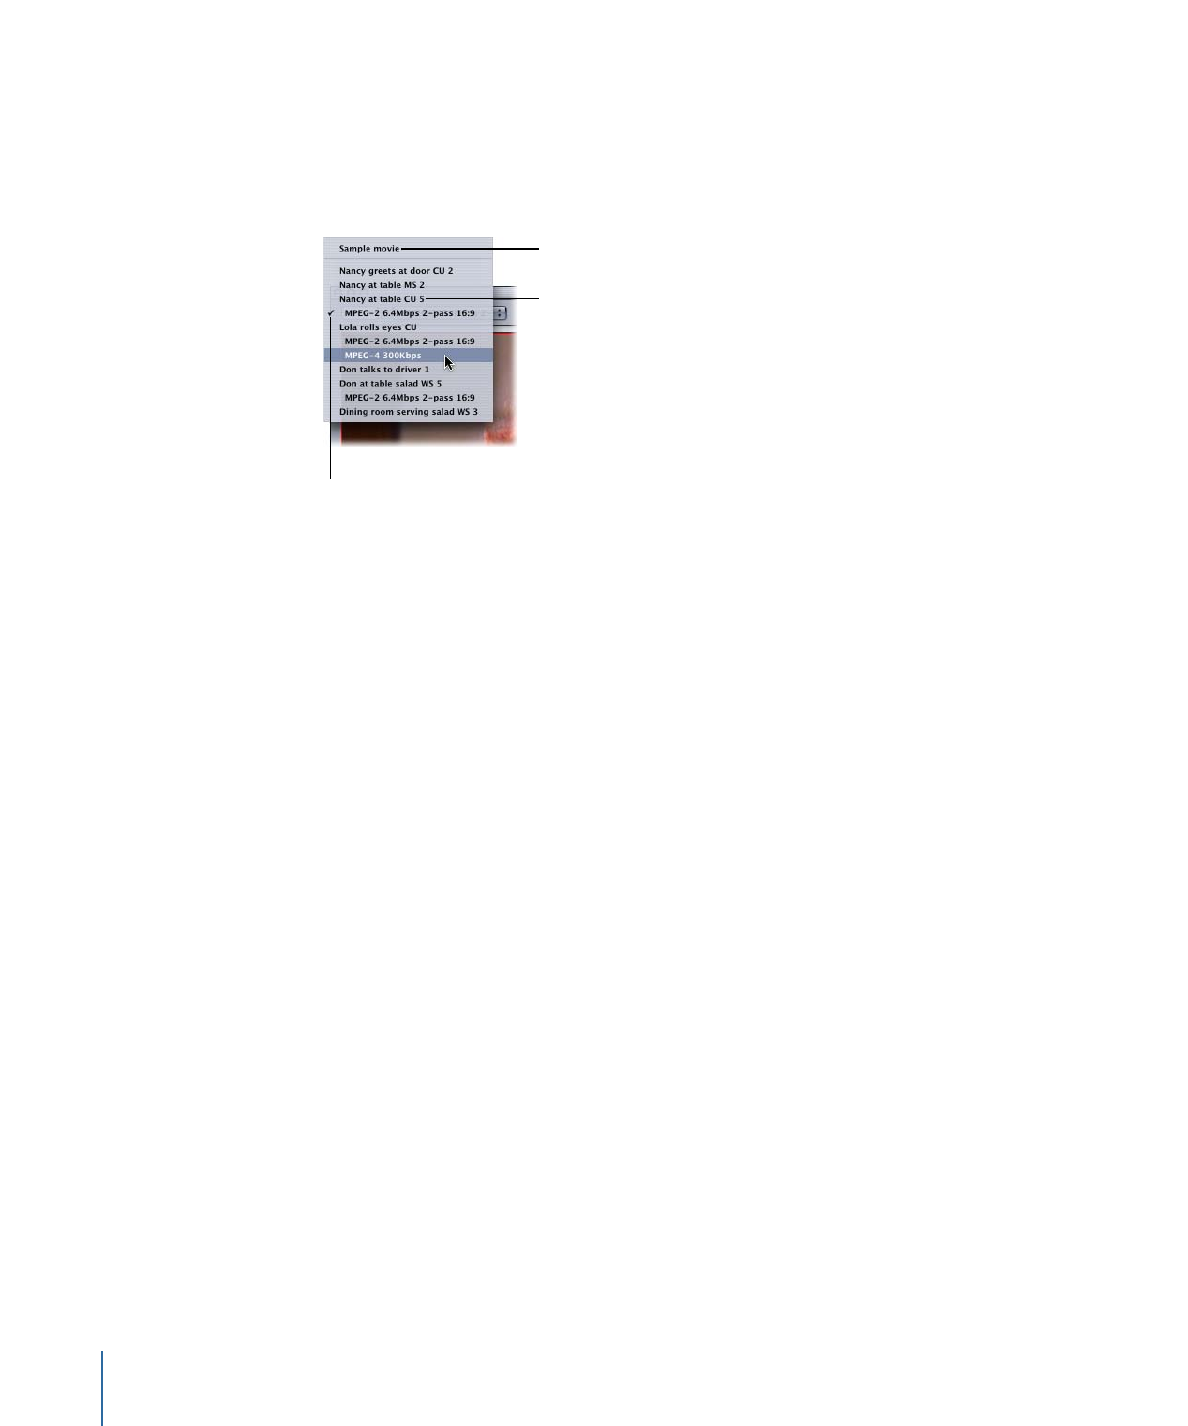
• Choose a source media file from the Batch Item pop-up menu (identified by its filename).
A setting applied to the
source media file “Nancy
at table CU 5.” The
checkmark indicates
that this is currently
being viewed in the
Preview window.
The original source
media file “Nancy
at table CU 5.”
Selects the default
color bars image.
• Click the Batch Item selection buttons until the source media file appears in the pop-up
menu.
• Select the source media file in its job in the Batch window.
Only the Source View button is active (and the Output View button is dimmed). This
is because you selected a regular source media file, so you can only see the
unadulterated clip—without the split screen divider or cropping bars.
3
Choose a Preview screen size from the Preview Scale pop-up menu, or drag the Preview
window handle to a size you like.
This does not affect the display frame size of the actual output media file. That can only
be set from the Geometry pane in the Inspector window.
4
Click the Play button to preview the selected source media file.
Source media files with markers already added, such as files from Final Cut Pro, will show
the markers in the timeline. You can manage the markers if needed. See
Working with
Markers and Poster Frames
for more information.
To preview a clip with an assigned setting
1
Open the Preview window.
Note: You can open the clip into the Preview window in one step, by double-clicking the
target (that contains the setting) of a job in Batch window.
312
Chapter 26
Using the Preview Window
2
Do one of the following:
• Choose a setting from the Batch Item pop-up menu (the indented setting names, not
the source filenames).
• Click the Batch Item selection buttons until the clip with a setting appears in the pop-up
menu.
• Select the clip’s setting in its job in the Batch window.
Both Source and Setting (Output) View buttons are active so you can switch between
these two views. Because you selected a setting, you can use the split screen slider and
cropping boundary in the Preview window.
3
Click the Setting view button in the upper-right corner of the Preview window.
4
Choose a Preview screen size from the Preview Scale pop-up menu, or drag the Preview
window handle to a size you like.
This does not affect the display frame size of the actual output media file. That can only
be set from the Geometry pane in the Inspector window.
Note: When you adjust the frame size of a setting (in the Geometry pane) while you are
viewing it in the Preview window, the frame size may not resize accordingly. If this occurs,
select Sample Movie or a different target from the Batch Item pop-up menu and then
select this target again. It will display the correct frame size.
5
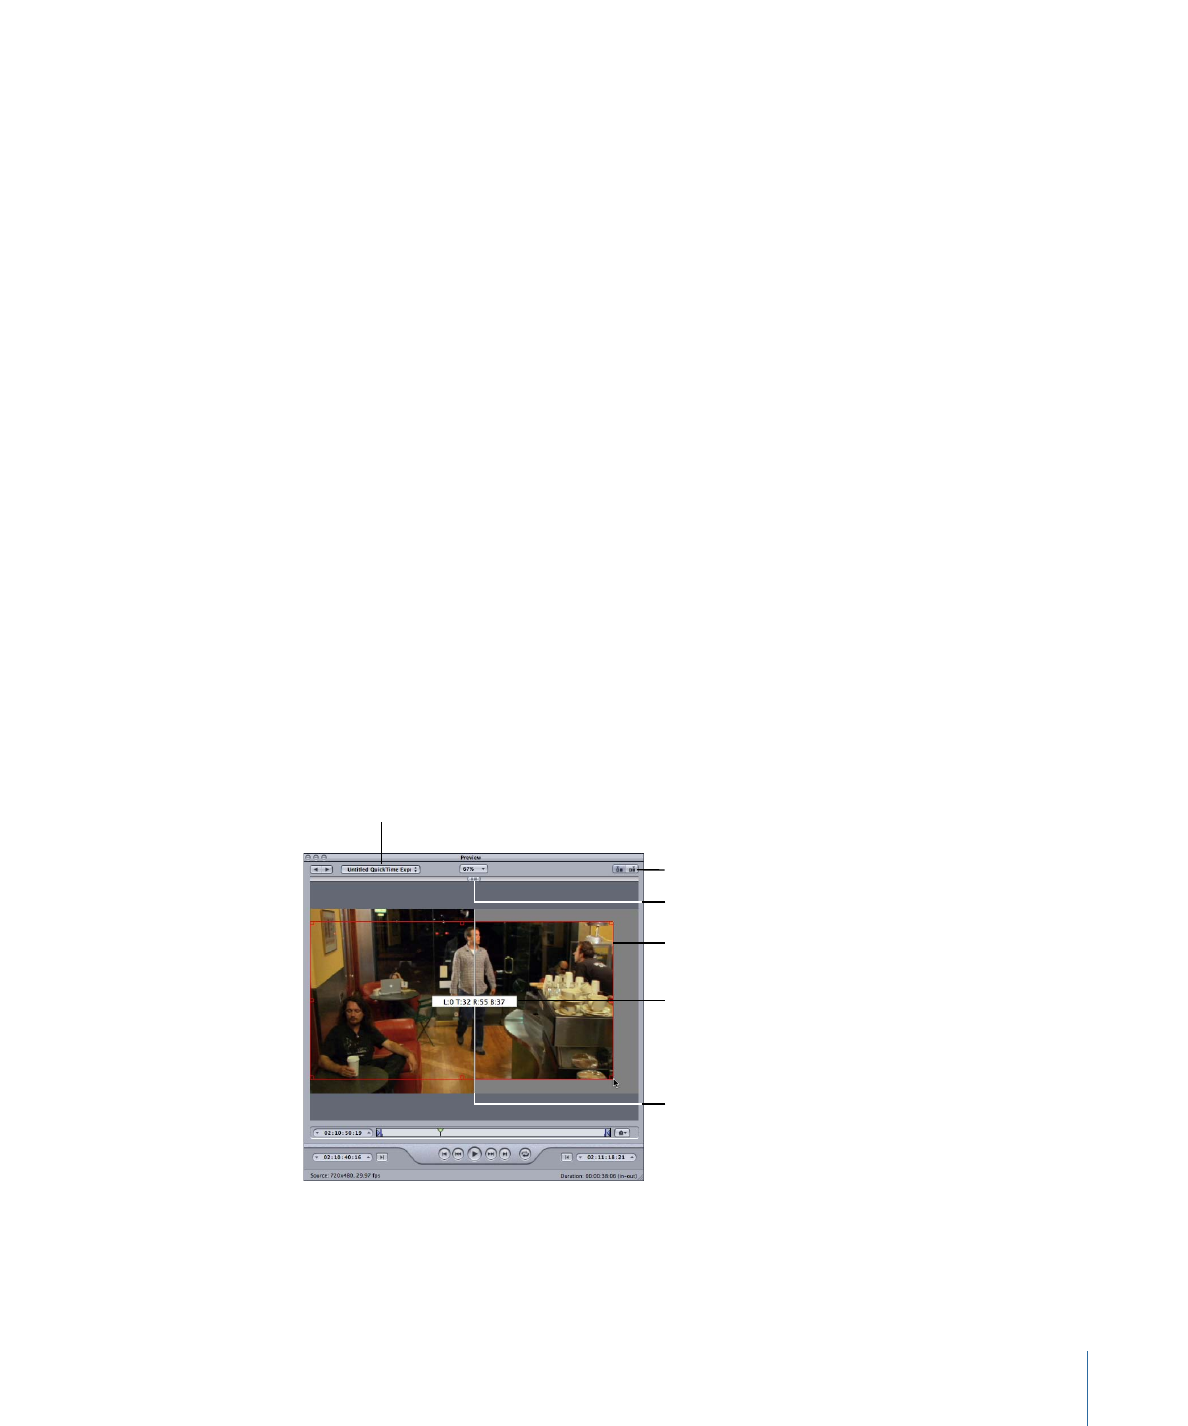
Drag the split screen slider left or right across the top of the screen to move the split
screen divider over more or less of the transcoded portion of the clip.
6
Use the cropping boundary to adjust the display frame size of your output media file.
Cropping boundary
and handles
Split screen slider
Split screen divider
Cropping dimensions
(also seen in Source
Inset fields in the
Geometry pane)
Source and Setting
View buttons
Batch Item
pop-up menu
7
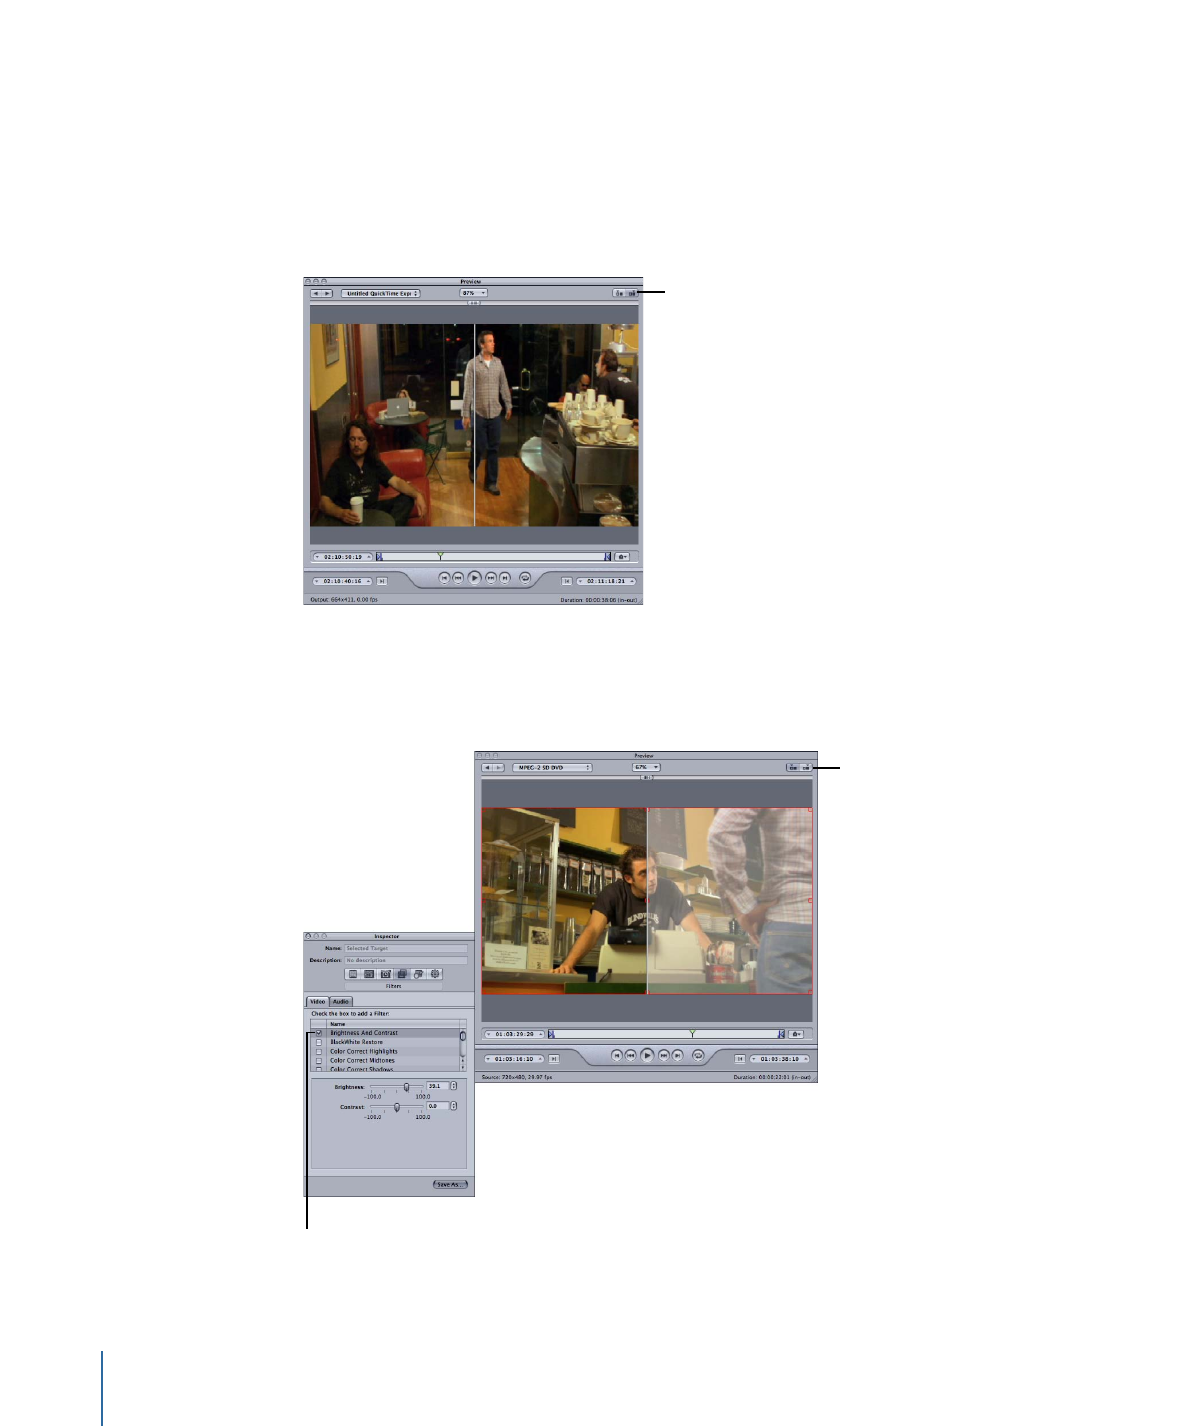
Check the results of your cropping by clicking the Source and Setting View buttons.
313
Chapter 26
Using the Preview Window
Note: The more you reduce the clip image by cropping it, the larger the scale factor of
the output image will be (as the framing geometry conforms to the settings of the output
size ratio rather than to the source file settings). This effect is similar to zooming in on an
image, which results in larger pixels and overall image degradation. So make sure that
you don’t crop in so far that the image is enlarged past its original size relative to the
original size of the frame.
Source and Setting
View buttons
8
Select the filter that you want to adjust and make changes as necessary.
Note: The filter you select must have a checkmark next to it in the Filters list. Otherwise,
the filter won’t be applied to the setting.
Selected filter settings
are displayed in the
Preview window.
Setting selection
314
Chapter 26
Using the Preview Window
9
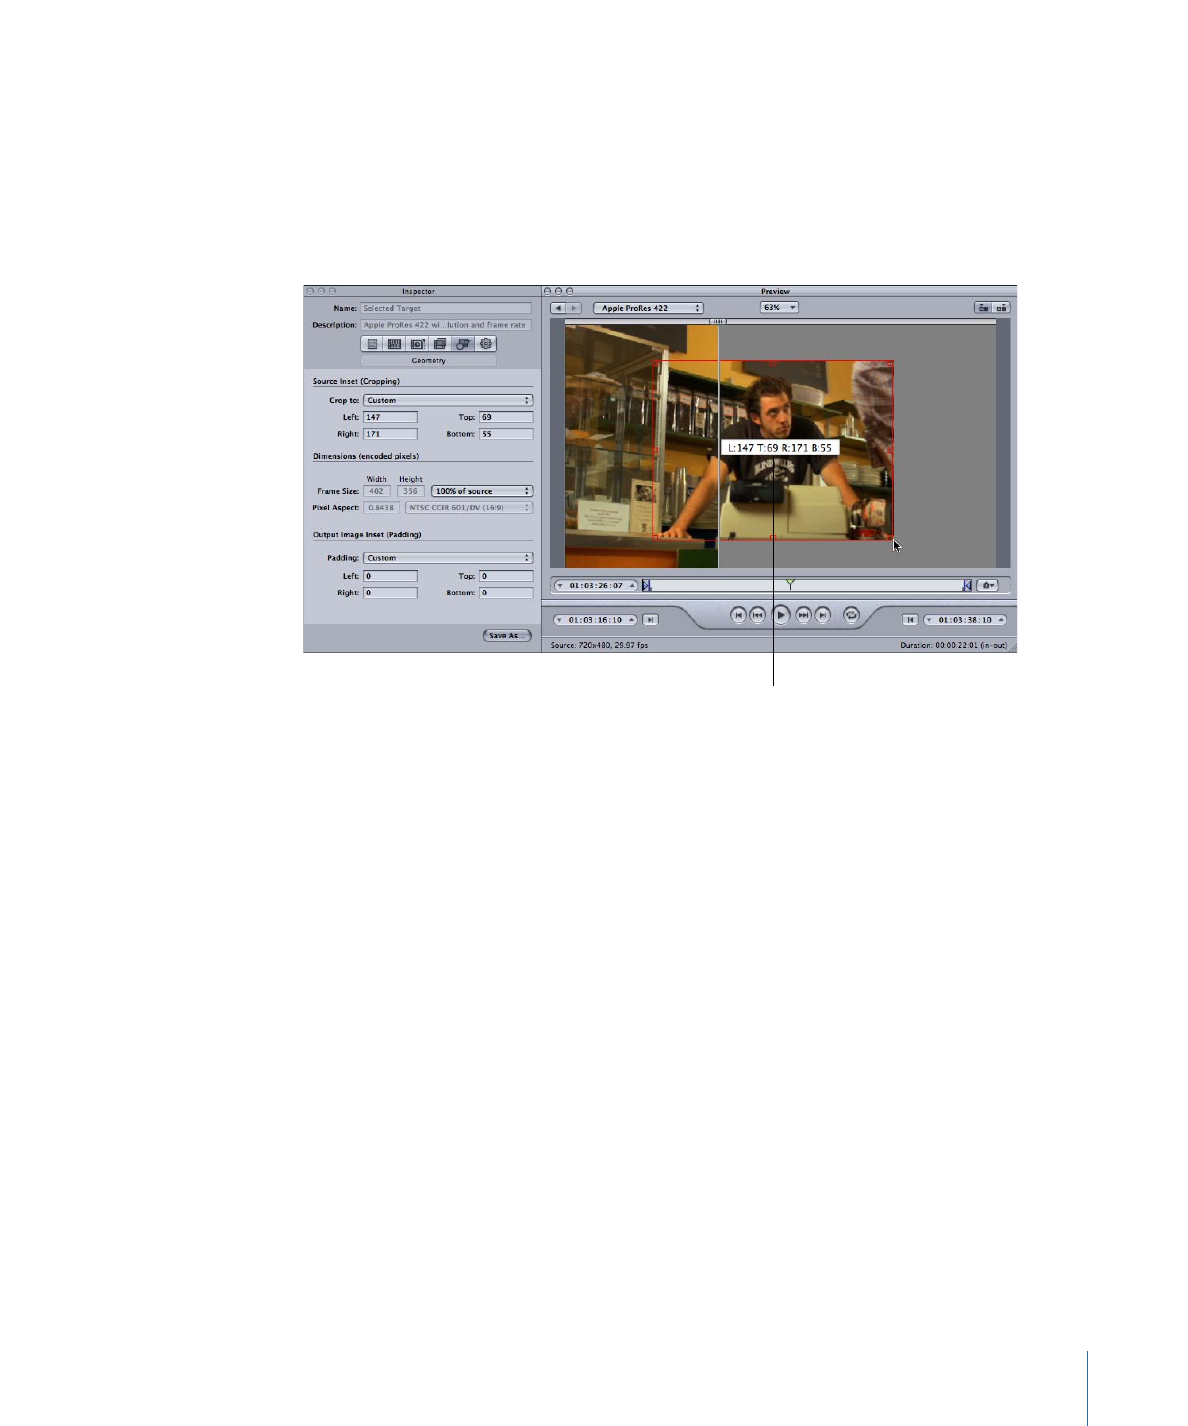
If you want to make the display frame size of your output media file different from that
of your source media file, open the Geometry pane in the Inspector window and choose
a preexisting value from the Frame Size pop-up menu or enter different output size values
in the relevant fields.
Note: MPEG-2 is limited to preestablished display frame sizes based on MPEG-2
specifications. In this instance, all output size items are unavailable.
Cropping dimensions
(also displayed in the
Inspector window when
you drag cropping bars)
10
Click the Play button in the Preview window to view the clip.
See
About the Preview Window
for more information about these settings.
315
Chapter 26
Using the Preview Window

Playing Dolby Digital Professional (AC-3) Files in the Preview Window
You can use the Preview window to play back Dolby Digital Professional (AC-3) files.
Compressor includes a Dolby Digital decoder so that when you add an AC-3 source
media file to a batch and play it, you are able to hear it using your computer’s current
speakers. This includes everything from the built-in stereo speakers, which play a
mixed-down version of the AC-3 file if it contains more than two channels, to a set of
external surround speakers connected to a USB or FireWire output.
Important:
Since Compressor is decoding the Dolby Digital audio file, you cannot use
your computer’s optical output to preview Dolby Digital audio.
This feature is important if you are using the Dolby Digital Professional encoder since
you cannot preview the encoder’s settings in real time in the Preview window. Instead,
you can add the encoded AC-3 files to a batch and play them to verify that the encoder’s
settings produced good results. See
Transcoding a Portion of the Clip with the Preview
Window
for information on creating a short test clip for this purpose.